
Psssst…
Hey you! Are you a parent? Are you a parent that has given serious consideration to chucking a Playstation or Switch out the window if you have one more request for V-Bucks?
Then come with me!
Seriously though. Winter can be a rough time of year for the kids. Playing outside in gross half-melted snow isn’t a serious amount of fun, and so it’s easy for them to fall back on video games. But then they have spent so much time remote learning in front of a screen, if you are like me, you are looking for ways to pull them away from the screen and give them something fun to do!
Have you ever wanted a fish, but then thought, “ehhh fish are hard?” OK, me neither, but this little craft still looks fun and the finished product is pretty cute!
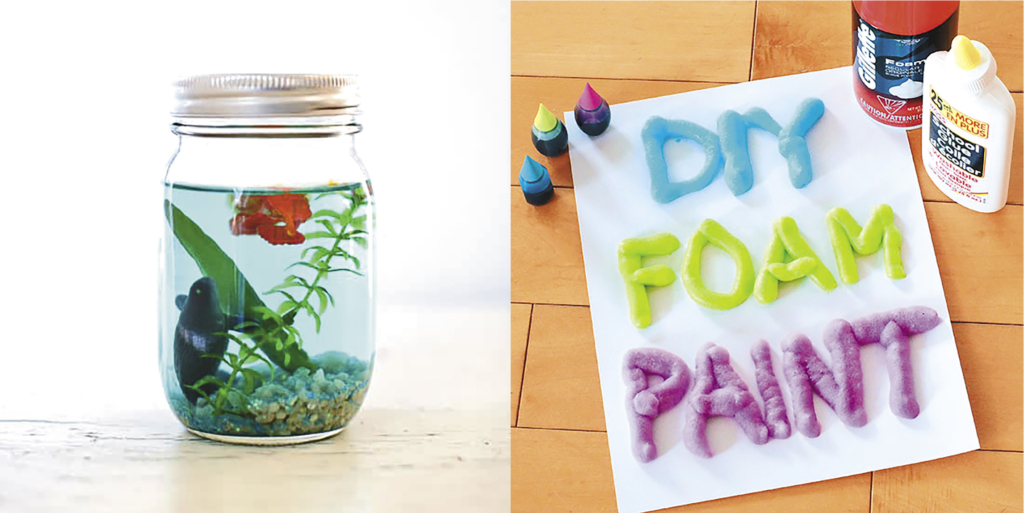
Mason Jar Aquarium
This mason jar aquarium is a fun pretend play toy to make for kids! They will love taking care of their fish without the fuss!
Materials:
• Mason Jars
• Blue Food Coloring
• Filtered Water
• Aquarium plastic figurines or toy fish
• Blue and white glitter (optional)
• Glycerin (optional, helps water flower more slowly)
• Aquarium rocks and plastic plants
Instructions
Add rocks, plants to your mason jar.
Fill with water and add some plastic sea creatures.
Add some blue food coloring until you are satisfied with the color.
Add glitter if using.
Add a few drops of glycerin more if you want the water to flow mores slowly and look more viscous.
Screw lid shut (at this point you can also glue the lid with some hot glue if you’d like).
Gently swirl to see your sea creatures swim!
If you have a youngin’ that is more artsy, might I suggest Foam Paint? It looks super cool and doesn’t have anything in it that would be terribly difficult to clean up and that’s always a bonus!
Making foam paint is as easy as it gets. You’ve got your shaving cream, your craft/school glue and your food coloring — that’s it!
Mix equal parts shaving cream and glue into a ziplock bag, add your desired food coloring and then, with the bag sealed, squish the bag together until all your ingredients are nicely mixed together. Have your little artists create a layout for their design on a semi-rigid material (like poster board) and when they’re ready for the foam simply cut off a corner at the bottom of the bag and use like you’re piping icing. Once the art has been completed, set aside so the foam can dry and solidify overnight.
Hopefully, these little crafts will help you get the littles away from the screen and get some fun family time in to beat back the winter blues.


Leave a Comment
Your email address will not be published. Required fields are marked with *